Printable Version
Editing Checklist: Edit My Auction
You will see a blue save button located on the left side of your screen once all images are published to the site for managing. If it does not let you save and it is grey instead of blue, the images in your auction are not all published and any work you do moving or rotating will not be saved to the system. Double check you have a blue save button before starting on editing your photos.
Managing Images: once your lots of media has been assigned to the correct lot number.
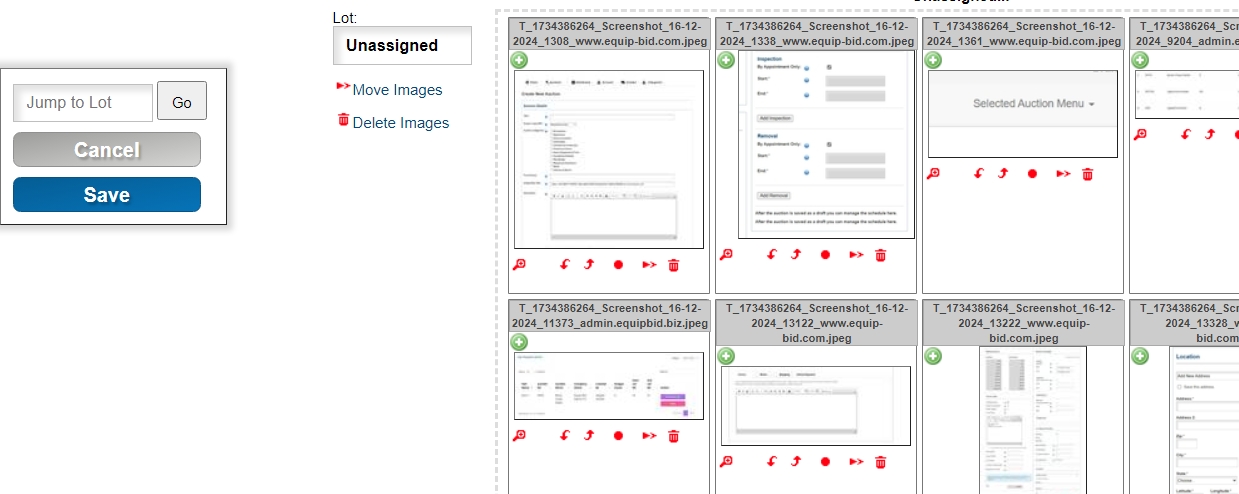
A1. Move Images - the first image will be the image that appears on the auctions home screen as the bidder is scrolling. To rearrange images, hold down the image along the edging of the image and drag it to its correct space in sequence.
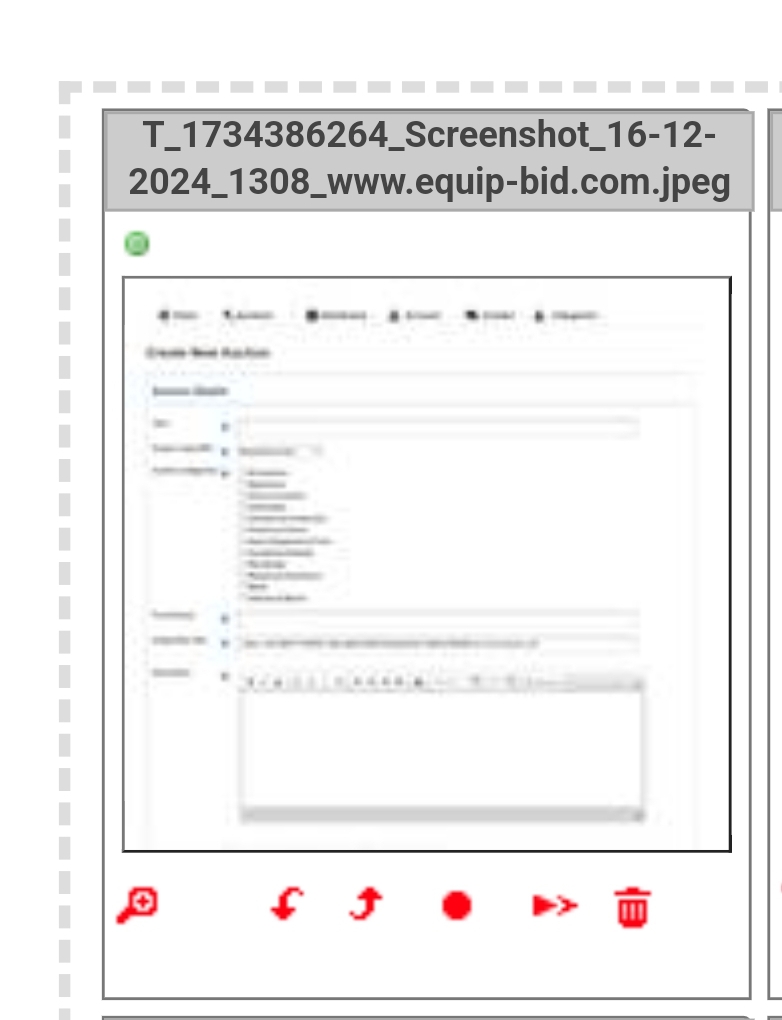
A2. Magnify Images - represented by a magnifying glass below each image it will allow you to see a larger format of this image.
A3. Rotate Images - use the curved arrows on either side to rotate images into their correct position.
A4. Move Images to Different Lot - select the red circle located on the centered bottom border of the image border, the image as well as the images following the selected image will jump to an unassigned lot. If you only want to reassign one photo, reposition it to be the last image in the lot before you select the red circle.
A5. Delete Photo - represented by a trash can, this function will allow you to delete the image. It will prompt you if you’re sure before it is completely wiped. Once an image is deleted it cannot be recovered.
A6. Reassigning / Copying Images to New Lot

to reassign a sequence of images or duplicate a sequence of images select copy images located under the lot number tab on the left-hand side of the screen. Enter a lot number that will receive the images and select a copy if you want them to remain in the current lot as well as move to the new location.
Now that your images are assigned to their forever home in their correct lot, you are ready to move onto descriptions and categories.
When working on your auction edits you will find DASHBOARD, Lot List your go to for all the helpful features you will need to edit details in your auction. To access this specific auction always refer to the AUCTION ID, not the title of your auction to access your lot list for this auction.
Stock Photos Policy - Equip-bid does allow use of stock images from retail items scanned, as long as real images of listed lots are present. Under no circumstances should your lot only include stock images.
Batch Selecting Lots
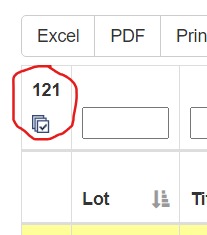
By selecting the small multi box located directly below the excel tab you can select all lots in auction at one time. This feature is important for selecting all lots for
- Starting price
- Shipping Disabled or Enabled
- Category for all lots selected
- Taxes Disabled or Enabled
- Seller
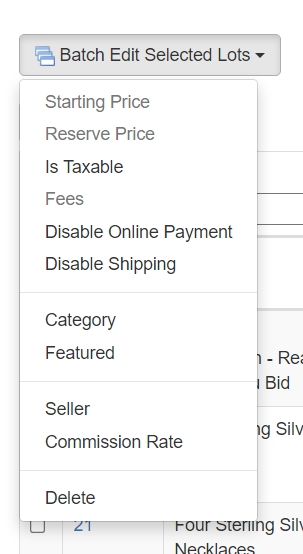
You can also individually assign certain lots for each seller as well as selecting (6) featured items, these featured items will be the (6) listed on the home page bidder sees first when scrolling through the feed for your auction.
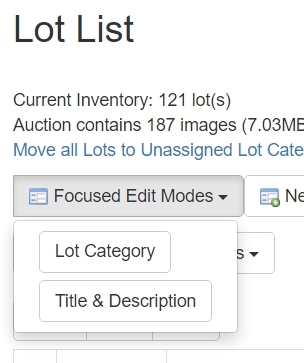
Focused Edit Modes
A1. Lot Category - this feature will allow you to individually select each lot and assign it to a category that would best describe your lot.
Helpful Hint: the auction will not be updated until you save on category screen, if you change categories without saving before exiting the window your progress will not be saved to your updated draft.
A2. Title and Description - this feature allows you to see the lot title and description with a thumbnail of the lot to edit spelling, description, and title.
Create New Lot

If you have images for a lot but want to manually upload and assign it a lot number not already assigned to your auction.
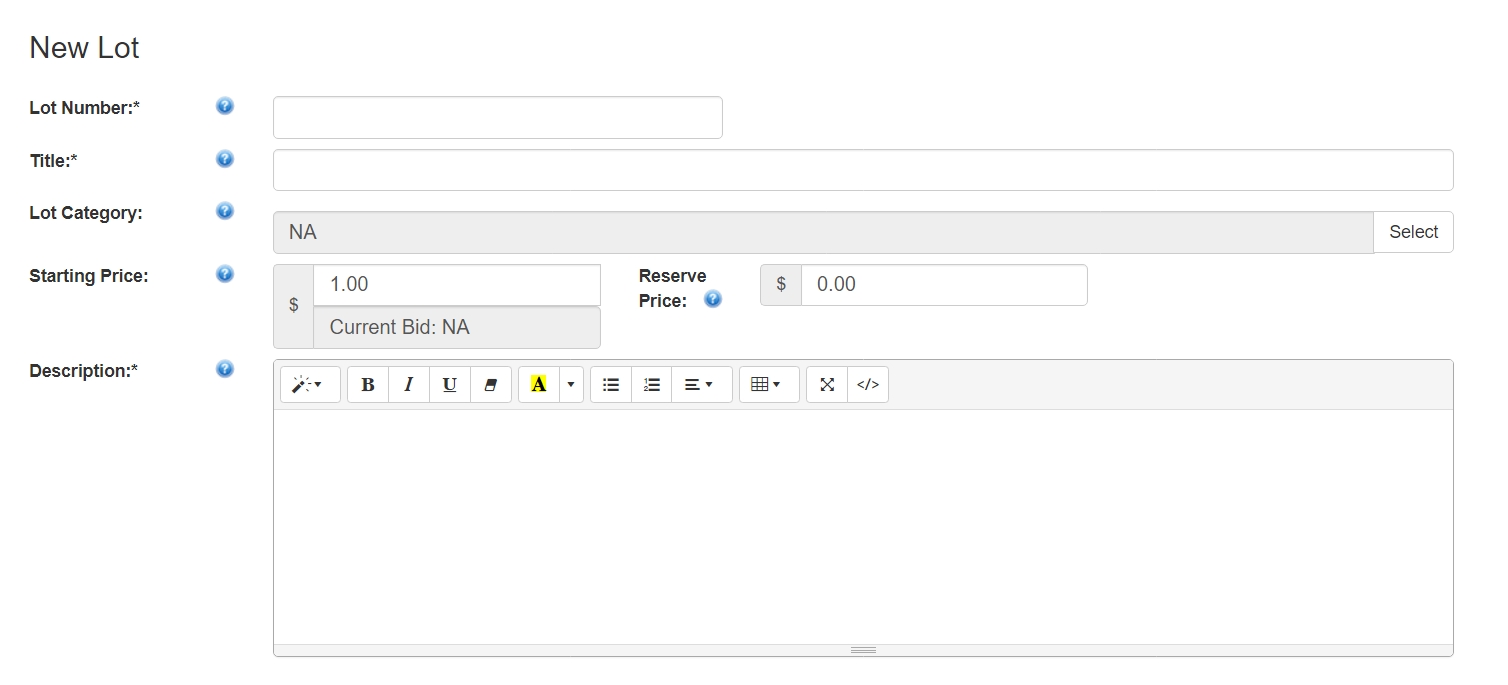
Here you will assign a new lot number, depending on where you would like this lot to be represented in the auction, lower numbers appear at the top of the auction, as well as the largest number will appear at the very end of the auction, since the lot numbers fall in sequence. After you complete all the necessary information you will repeat this step with Upload Images and assign the uploaded images to the new lot number you created. Images and Lot will align, and you will then be given an option to save all information present as well as the attached images assigned to the lot number.
SAVE and NEXT LOT will direct you to the next lot already saved in que for this auction
SAVE and NEW LOT will direct you to a lot not yet assigned in this auction that falls in sequence to the previous lot.
Create Information Lot - LOT 0
Create Lot - assign LOT 0 and assign category as Info Lot
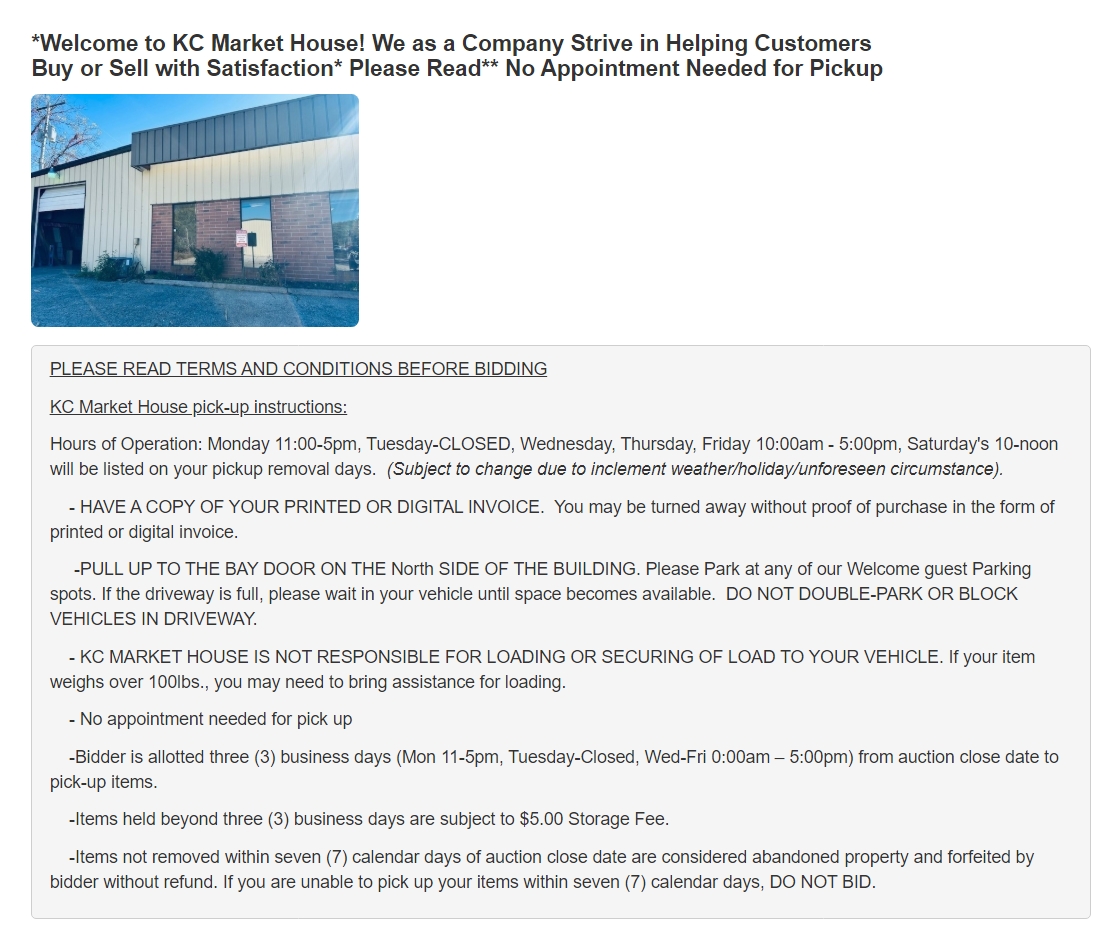
Listed above is an example of an information lot from an Equip-bid Affiliate