To upload data from the Equip-Bid app to the Equip-Bid website, you'll typically need to follow a set of steps designed to transfer the data from the mobile or app-based platform to the web-based interface. Equip-Bid is an online auction platform, and their app and website are both tools to facilitate auction listings, management, and bidding processes. Here's a general guide on how to upload data from the Equip-Bid app to the Equip-Bid website:
Steps to Upload Data from Equip-Bid App to Website
App Website: App Website
Equip-bid Main Page: Main Website Link

Ensure Proper Login/Account Setup:
- Before uploading data, make sure you are logged into both the Equip-Bid app and the Equip-Bid website with the same credentials. If you are a seller, make sure your account has the necessary permissions to upload auction data.
Your logon information may be different on the two separate interfaces, so making sure you’re logged into both on separate tabs is important.
Before you begin downloading your data, please check to make sure all data on the app was uploaded fully to our database before you initiate the transfer process.
If you have data that is lingering in the queue you will see this message on your app.
RED RINGS: Red rings are lots that were not uploaded to the cloud properly during the time of listing. Red rings would signify that either images or a portion of descriptions need your attention before you can download the data to the website.
Troubleshooting Red Rings:
Step 1: Connect to Wi-Fi
Step 2: Update Existing Lot
Step 3: Repeat Until All Red Rings are Resolved
You will receive a message at the bottom of your screen that states all lots have been updated.

Represented are two separate auctions cataloged on your listing app.
BAR - indicates you have 102 lots but only 101 with images. This would be your first indicator that you have images in que (red rings).
PAINT CO SD - indicates that all lots listed have all images associated with lots. This auction is ready to be downloaded.
Now Let's Get Started Downloading!
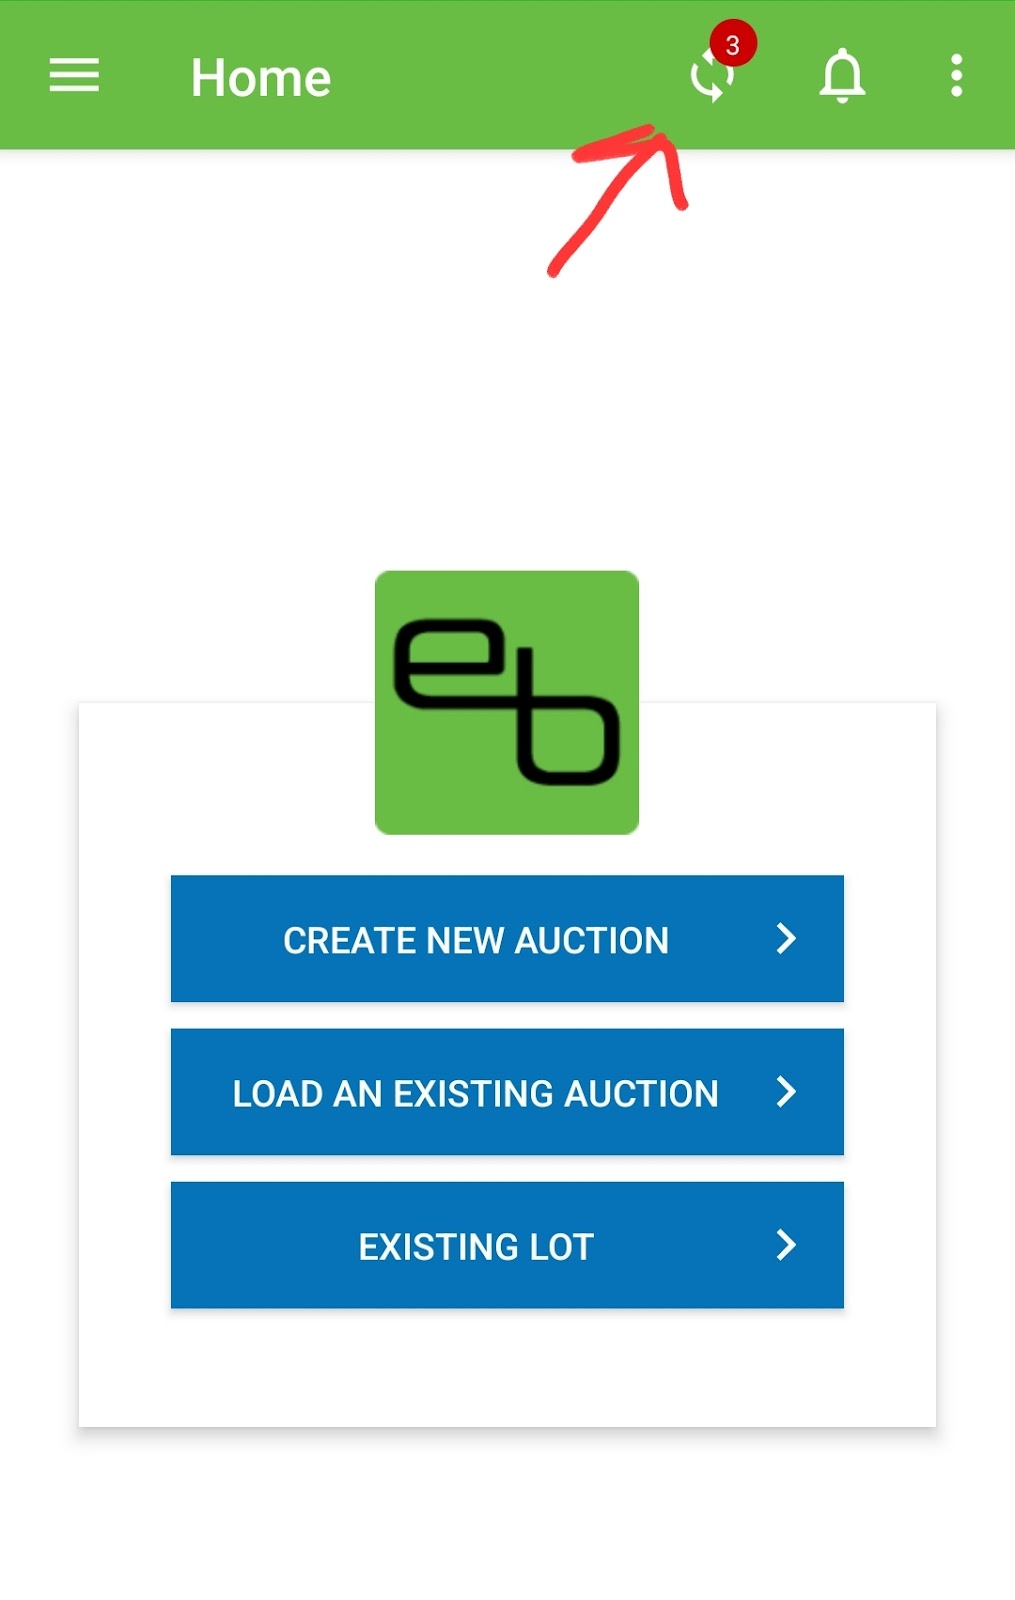
Step 1: UPLOAD YOUR DATA from App Website Link
On the left-hand side:
Step One: Download Your Media
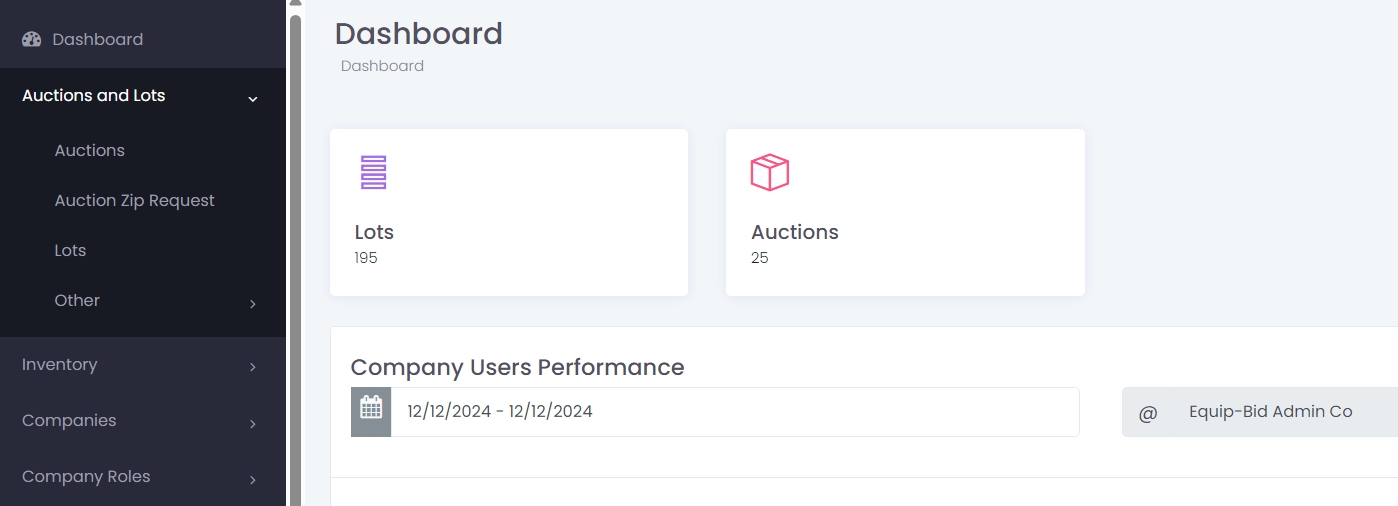
Auctions tab - this is where you will find your cataloged information.
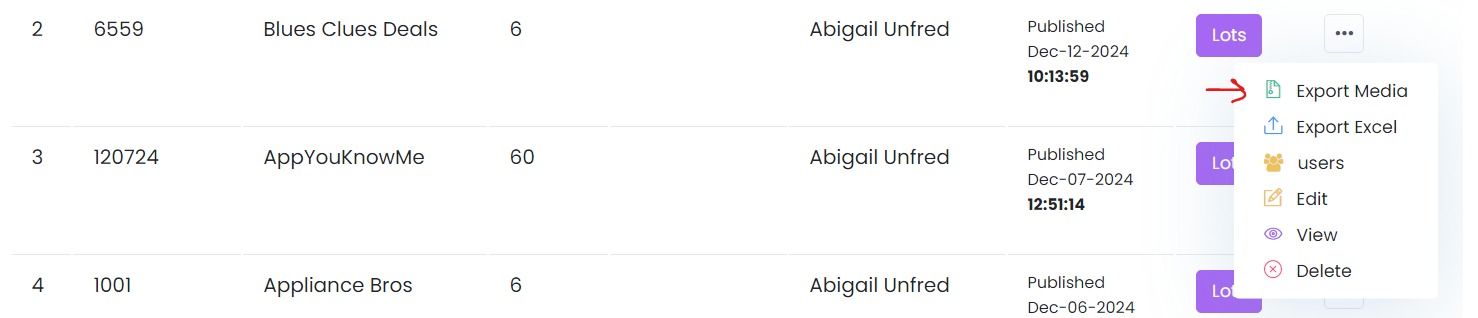
The three dots to the far right of your screen will present a drop down.
Select Media
A2: Zip Request

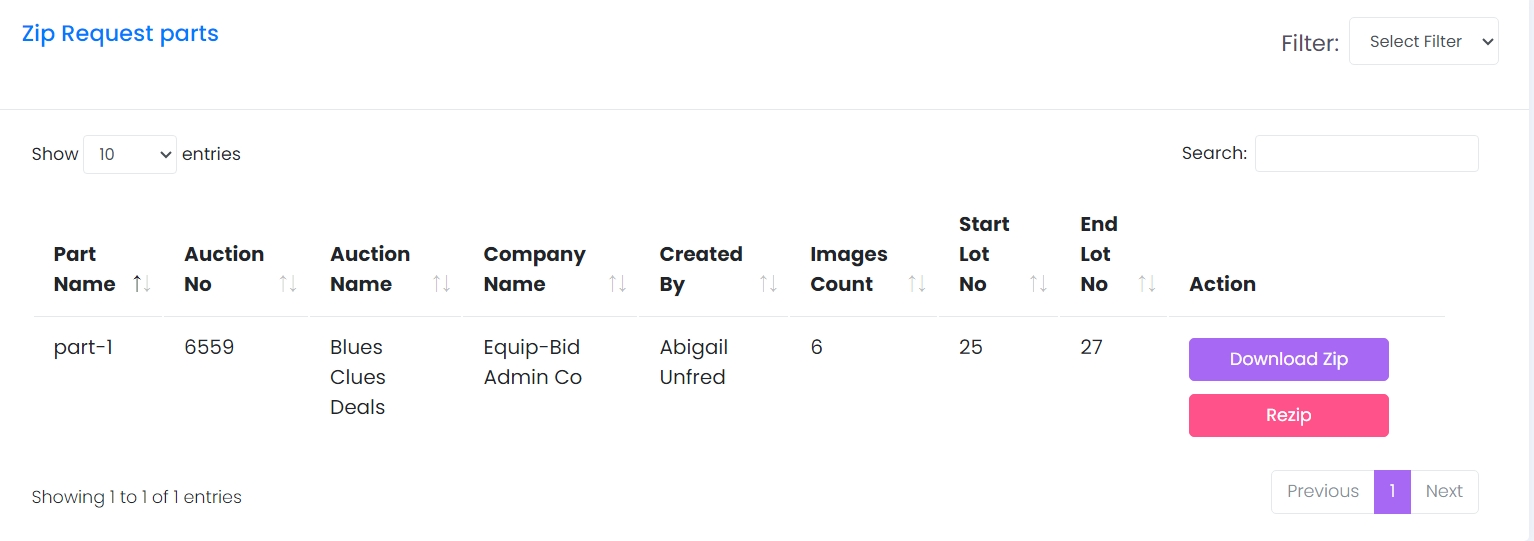
View Auction Parts - for every 499 images you will be given a new part to download.
Example: Auction contains 600 images - it will be two parts -
Part 1 - will include 499 images
Part 2 - will include 201 images
Both parts must be downloaded to complete the media portion of the download.
If your auction has less than 499 images it will be processed as a singular part.
Example:
A3 : Open Downloaded Zip
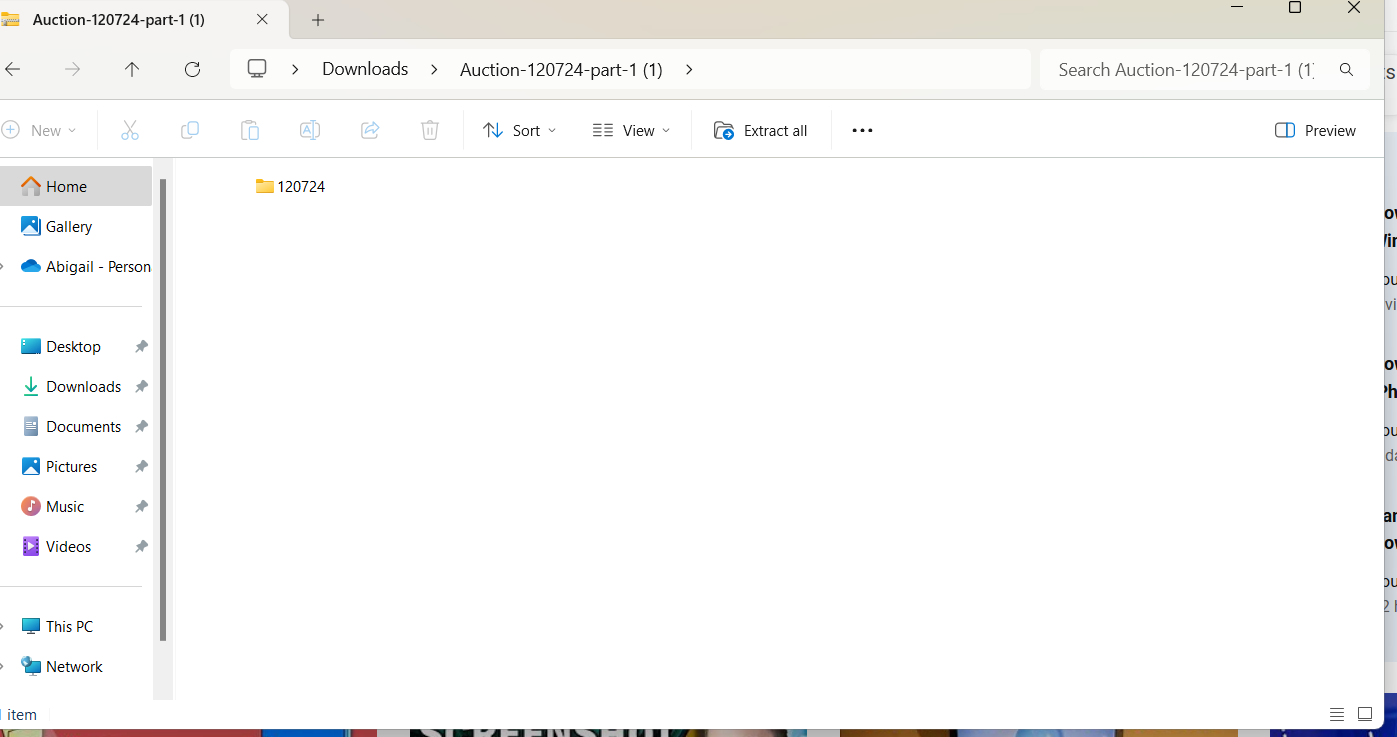
For images/ media, you will be prompted to “Extract All”
Select the folder you downloaded and Extract into the assigned folder for you to find when uploading to the main site.
Once all images have been extracted you will be able to access the images as JPEG format.
Step Two: Download Your Descriptions 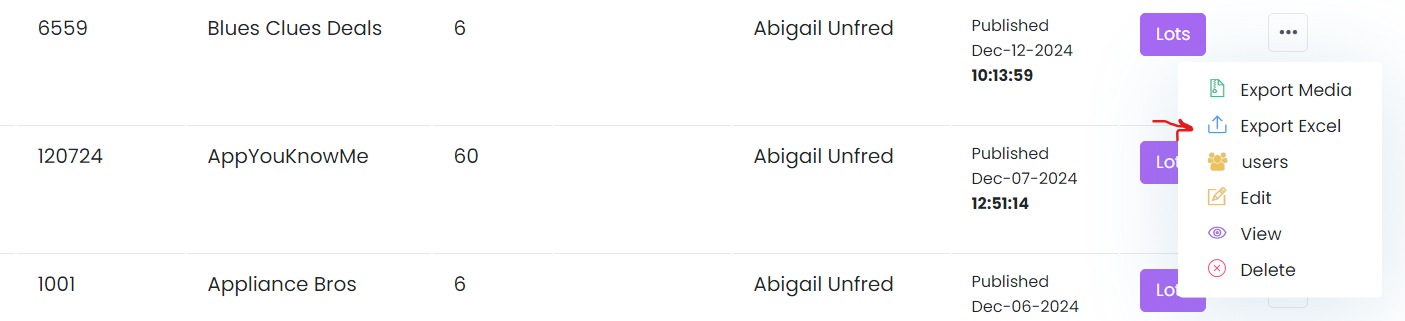
Using the same three dots you will export your descriptions (export excel)
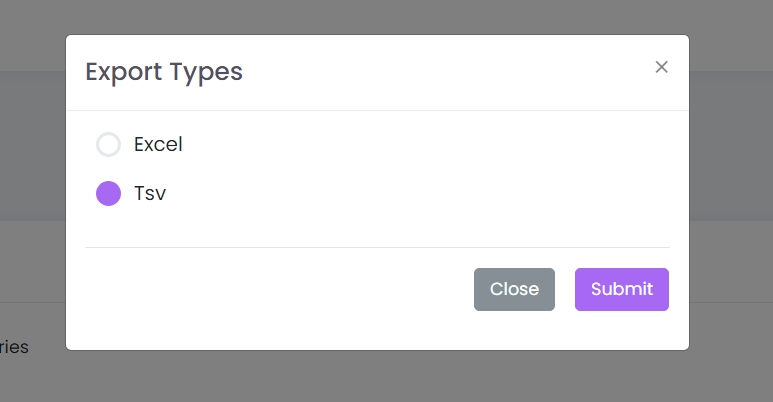
2B: You will select TSV format and then exit the prompt.
3B: Now you should have all the media and data (tsv) downloaded to your computer, double check you do before you continue to upload to www.equip-bid.com
Step 3: Uploading to Equip-bid.com
Log Into Equip-bid with Affiliate Login Information
(Refer to Create Your First Auction Tab for Help)
Once You’re Logged in to Your Affiliate Dashboard
Step 1:
Click on the AUCTION ID that was assigned to your auction when you created the draft.
Click on the AUCTION ID to continue uploading your auction media and descriptions. (Where you edit)
Title of Auction will only allow you to preview the auction.
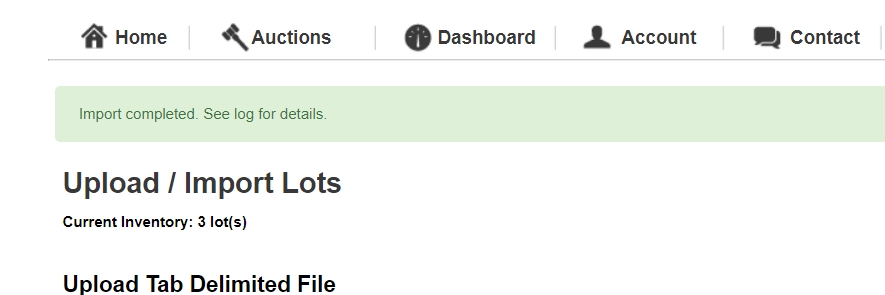
STEP 2: IMPORT LOTS/ DESCRIPTIONS: Import Lots
2B: On this screen: Choose File - Upload the TSV File
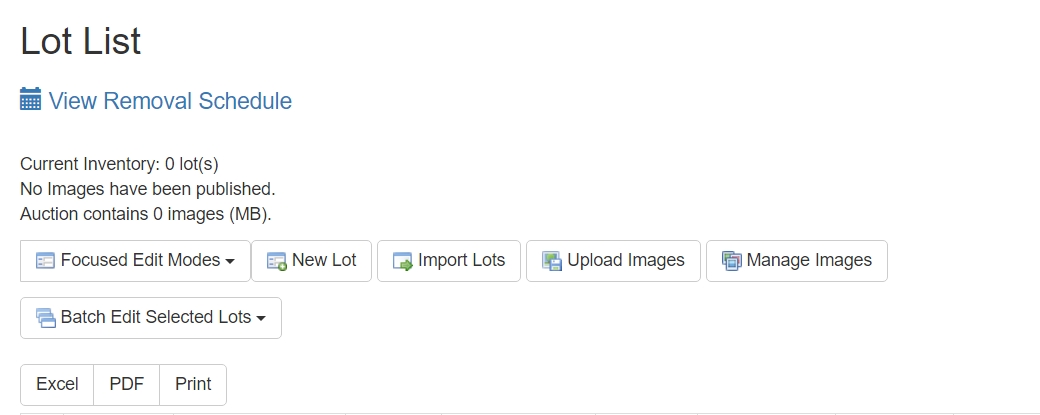
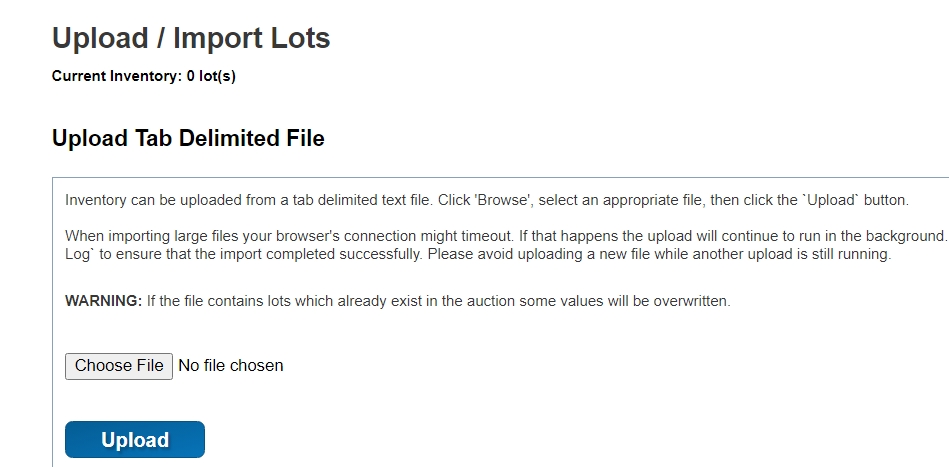
3B: Now you should see all listed lots under the current inventory to ensure all lots correctly are uploaded.
STEP 3 : Upload Media / Photos to Auction - UPLOAD IMAGES

3A:
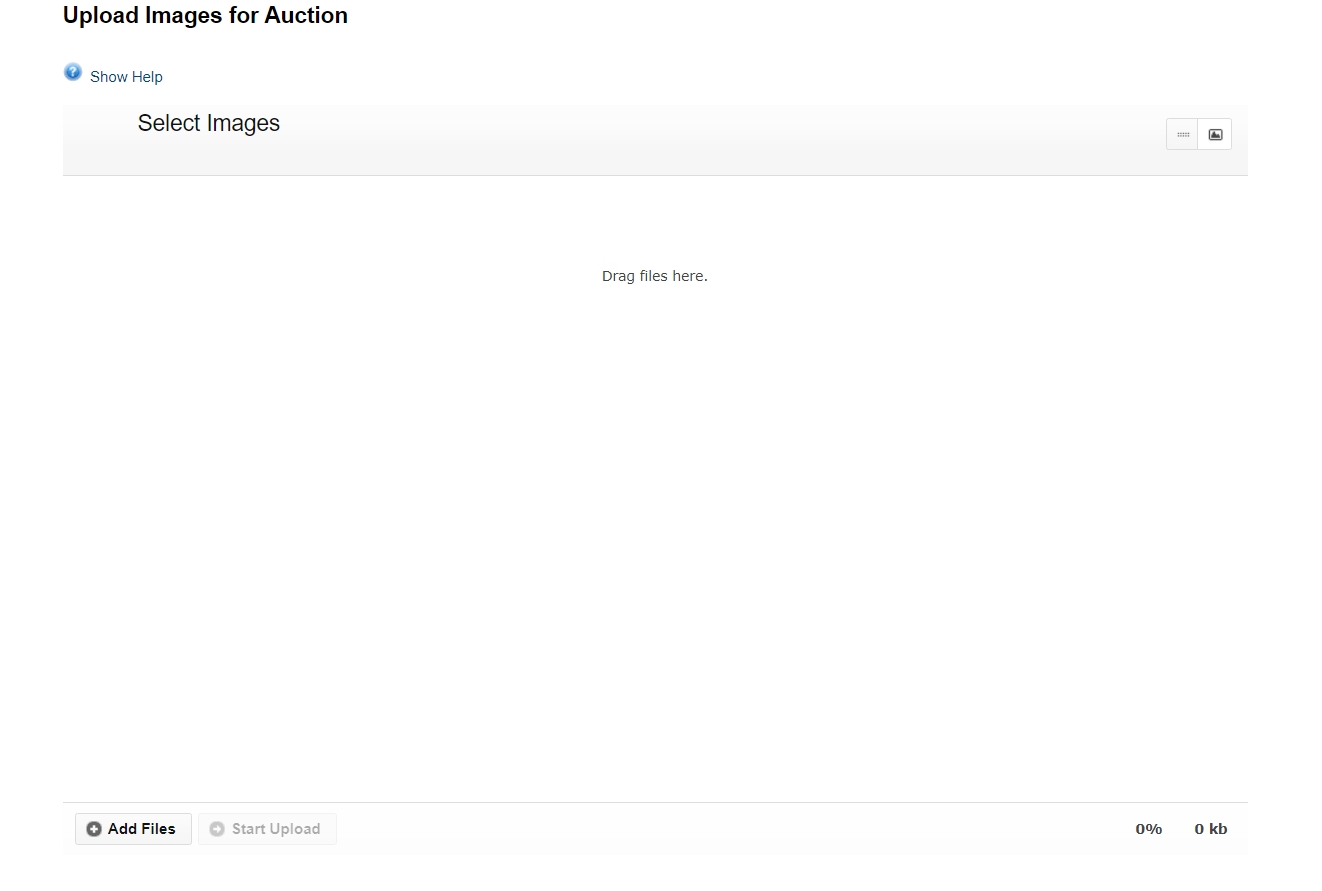
On this screen : Upload Photos that you saved the images you had zipped from the admin.equip-bid (app) website and saved to your computer.
3B: Once your images are in que START UPLOAD
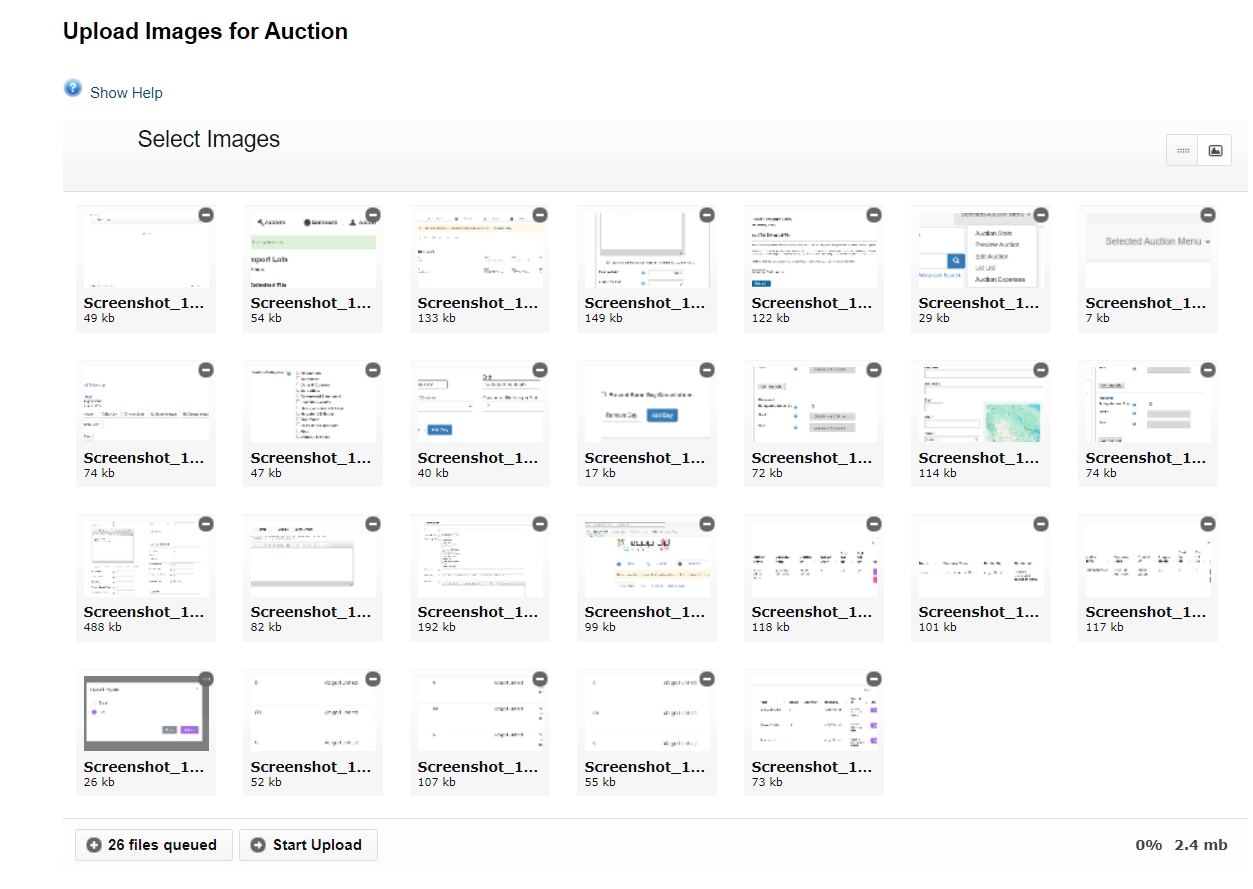
On this screen you can see thumbnails of all images assigned to this auction. If you see any images that you do not recognize or the count of your auction parts do not match, this is the screen you can verify that information on before moving forward.
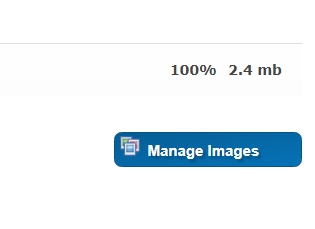
4B : All of your images should be 100% , now you’re ready to MANAGE IMAGES
It may take 10-15 minutes for all of your images to be rectified to the site. Especially if you have 700+ images, give the site a chance to catch up attaching all uploaded images to their correct lot and description. You will see a red heading banner at the top that allows you to see how many are published or still being published.